
How to use red light therapy for scars
The moment I realized red light therapy could fade my scars
I was standing in front of my bathroom mirror, angling my chin under the bright light, when I noticed something I hadn't seen in months: my acne scars were visibly softer. It wasn't a dramatic overnight transformation, but after three weeks of consistent red light therapy sessions at home, the texture and redness of my skin had genuinely improved. While we've previously covered the basics of LED light therapy, this guide tackles a specific challenge many of us face: using red light devices strategically to diminish the appearance of scars.
Whether your scars come from acne, surgery, or injury, red light therapy offers a non-invasive, science-backed approach you can do in your own home. Here's exactly how to do it right.
What you'll need
- A red light therapy device (660-700 nanometers is ideal for scar tissue)
- A clean, dry face
- Sunscreen (SPF 30+) for daytime use
- A consistent schedule (3-5 times per week minimum)
- Patience—results typically appear after 4-8 weeks
Step 1: Choose the right red light wavelength for scar tissue
Not all red light is created equal when it comes to scar treatment. Your goal is to stimulate collagen production and improve skin texture, which means you need red light in the 660-700 nanometer range. This wavelength penetrates deep enough to reach the dermal layer where scar tissue lives, triggering photobiomodulation—the process by which light energy stimulates cellular repair.
Why wavelength matters for scars
Red light in this range encourages fibroblasts (collagen-producing cells) to work harder, gradually remodeling the scar tissue into healthier, more normal skin. Devices that combine red light with near-infrared (700-1000 nm) can amplify these effects, reaching even deeper layers. When selecting your device, verify the wavelength specification on the product listing—this is non-negotiable for scar treatment results.
Step 2: Prepare your skin and establish a baseline
Before your first session, take clear, well-lit photos of your scars from the same angle and distance. This becomes your benchmark. You'll use these images to track progress over 4-6 weeks, which helps you stay motivated and assess whether the treatment is working for your skin type.
Cleanse thoroughly before each session
Wash your face with a gentle cleanser and pat dry completely. Any oils, makeup, or product residue creates a barrier between your skin and the light. For best results, avoid other active ingredients (like retinol or vitamin C serums) in the 2-3 hours before therapy, as they can increase sensitivity. Save those for your evening routine on non-therapy days.
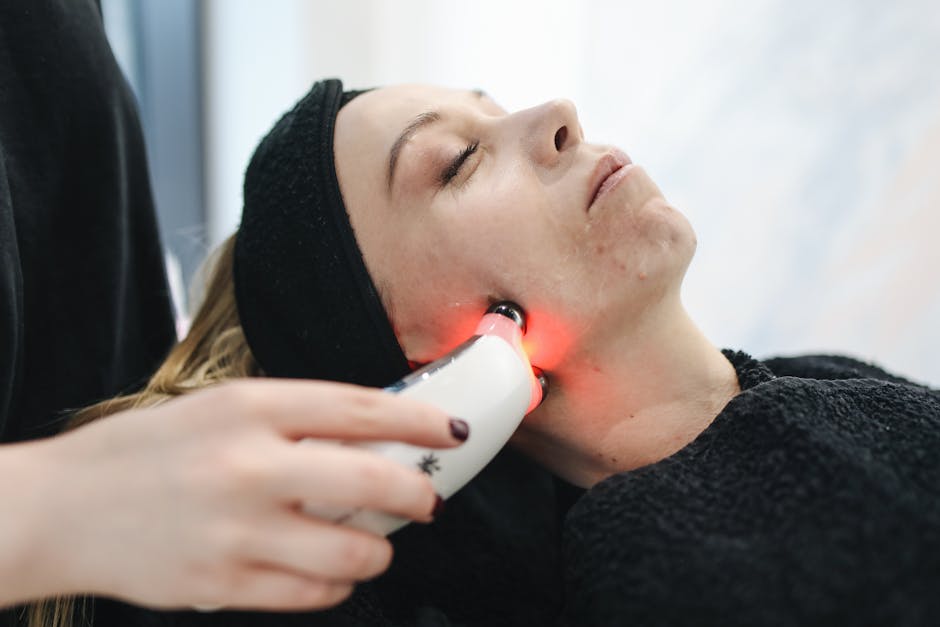
Step 3: Position the device at the correct distance
Distance matters enormously. Most clinical-grade devices work best at 6-12 inches from your skin surface—close enough to deliver therapeutic intensity, but far enough to avoid heat buildup. Check your device's manual for its specific sweet spot. If you're using a handheld panel like the Lunara Light™ LED Red Light Therapy Panel, hold it perpendicular to the scar area and maintain consistent distance throughout your session.
Target scar-prone zones
If your scars are widespread (like post-acne), divide your face into quadrants and spend 2-3 minutes on each zone. For localized, deep scars, you can concentrate longer on a single area—up to 5-7 minutes per scar. The goal is consistent light exposure without overdoing it.
Step 4: Stick to a realistic treatment schedule

Consistency trumps intensity. Start with 3 sessions per week (Monday, Wednesday, Friday works well) for 15-20 minutes total per session. After the first two weeks, you can increase to 4-5 sessions weekly if your skin tolerates it well. Don't jump to daily use right away—scar tissue remodeling is a slow process, and your skin needs recovery days.
Track your sessions in a calendar
Mark off each treatment day. This simple habit keeps you accountable and makes it easier to remember whether you used the device yesterday or two days ago. After four weeks, you should see subtle softening of scar edges and reduced redness. After 8-12 weeks, more pronounced texture improvement becomes visible.
Step 5: Combine with complementary skincare (optional but effective)

Red light therapy works beautifully on its own, but pairing it with scar-supportive skincare can accelerate results. On non-therapy days, use a vitamin C serum or niacinamide moisturizer to support collagen health. Avoid harsh physical exfoliation directly over scars, but gentle chemical exfoliation (AHAs or BHAs) 2-3 times weekly helps remove dead skin and reveal the improving texture underneath.
If you want an all-in-one approach, consider a multi-color LED mask like the Lunara Light™ GlowMask PRO, which combines red light for collagen with other wavelengths for inflammation control—useful if your scars are still slightly red or tender.
Step 6: Protect and monitor your progress
Red light therapy doesn't make your skin photosensitive, but sun protection remains essential for scar healing. UV exposure can increase pigmentation in healing skin, undoing your progress. Wear SPF 30+ daily, especially during the first 12 weeks of treatment.
Reassess every four weeks
Take new photos under the same lighting conditions every 28 days. Compare them side-by-side with your baseline. You should notice: softer scar edges, reduced redness, smoother texture, and less noticeable depth. If you see minimal change after 8 weeks, you might adjust the device position, increase session frequency (up to 5x weekly), or consult a dermatologist about combining red light with other scar-reduction treatments like microneedling.
Common mistakes to avoid
Expecting overnight results: Scar remodeling takes 3-6 months minimum. Many people give up after 2-3 weeks because they haven't seen dramatic change. Stick with it. Collagen rebuilds slowly, and that's actually what creates lasting improvement.
Using the wrong wavelength: Blue light treats acne; red light treats scars. If your device skews toward orange-red (below 650 nm) rather than true red (660-700 nm), you won't reach the dermal layer where scar tissue lives. Always verify wavelength specifications before purchasing.
Skipping sunscreen: UV exposure can darken healing scar tissue and counteract your light therapy work. SPF 30+ is non-negotiable, especially during active treatment.
Overheating your skin: More time ≠ better results. Excessive heat from extended sessions can irritate skin and trigger inflammation—the opposite of what you want. Stick to 15-20 minute sessions and allow at least one rest day per week.
FAQ
How long before I see improvement in my scars?
Most people notice softening of scar edges and reduced redness after 4-6 weeks of consistent use. Deeper textural improvement typically appears around 8-12 weeks. Very deep or extensive scarring may require 12-16 weeks or combination therapy with dermatological treatments.
Can I use red light therapy on active acne and scars simultaneously?
Yes, though you might alternate. Use red light (660 nm) for scar remodeling 3x weekly, and consider a separate session with multi-color LED therapy (which includes anti-inflammatory wavelengths) on other days. This prevents skin irritation while addressing both concerns.
Is red light therapy safe for all skin types?
Red light therapy is generally safe across all skin tones and types. However, individuals with photosensitivity disorders, those taking photosensitizing medications, or those with active skin infections should consult a dermatologist first. Always start with shorter sessions (10 minutes) to assess your skin's response.
Do I need a professional-grade device or will a budget option work?
Clinical-grade devices deliver more consistent wavelengths and higher irradiance (light intensity), which accelerates results. Budget devices may work, but results are typically slower and less predictable. For scar treatment specifically, investing in a verified red light panel ensures you're getting the right wavelength and intensity for actual tissue remodeling.
What if my scars get worse during treatment?
Red light shouldn't worsen scars, but if you notice increased redness or irritation, reduce session frequency to 2x weekly or shorten sessions to 10 minutes. If symptoms persist beyond a week, pause treatment and consult a dermatologist. Irritation is usually a sign of over-use, not the device itself.
Sources
- U.S. National Library of Medicine (PubMed) — Multiple peer-reviewed studies on photobiomodulation and collagen synthesis in scar tissue treatment.
- FDA (Food and Drug Administration) — Device classification and safety guidance for light-based beauty and medical devices.
- American Academy of Dermatology — Clinical evidence on light therapy efficacy for scar management and skin rejuvenation.