

Master Red Light Therapy at Home: Step-by-Step Setup Guide
Hook: Your First Red Light Therapy Session Doesn't Have to Be Confusing
I remember unboxing my first red light therapy device and standing in front of it with zero idea what to do. Distance? Duration? Daily or weekly? While we've previously covered the best red light therapy deals to snag during Prime Day, this guide takes a different approach — it walks you through the actual mechanics of setting up and using these powerful devices so you get real results from day one.
Whether you're investing in a full-sized LED panel or a portable mask, the principles are the same. In this step-by-step tutorial, you'll learn exactly how to prepare your space, position your device, time your sessions, and integrate red light therapy into your existing skincare routine for maximum benefit.
What You'll Need
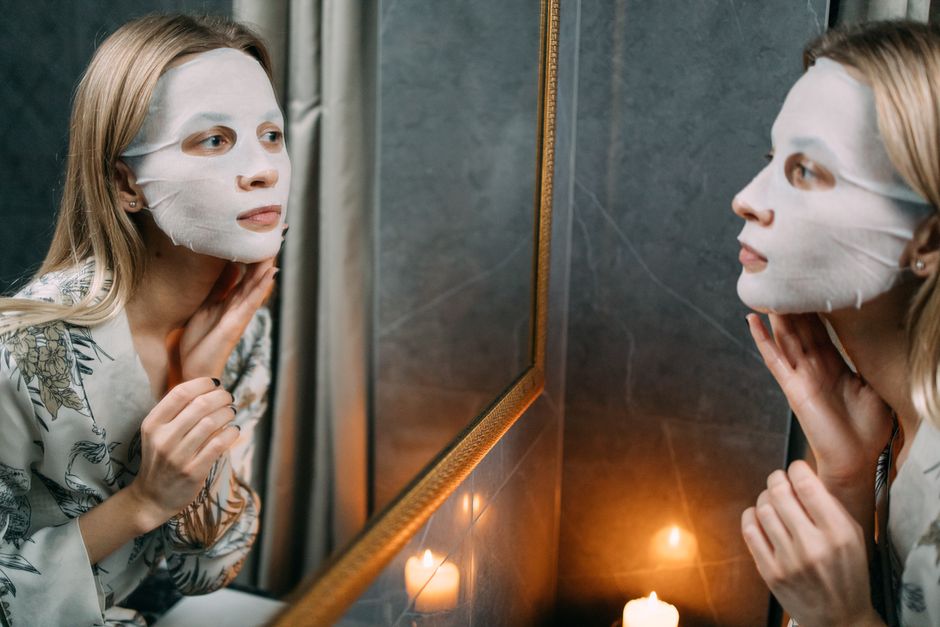
- A red light therapy device (LED panel, mask, or portable unit)
- A clean, flat surface or designated treatment area
- A timer or smartphone timer app
- A mirror (helpful for mask application or device positioning)
- Cleansed, dry skin
- Comfortable seating (for hands-free sessions)
- Optional: the Lunara Light LED guidebook to deepen your understanding of light wavelengths
Step 1: Choose Your Red Light Therapy Device and Understand Its Specifications
Before you power anything on, you need to know what you're working with. Red light therapy devices come in different forms — panels, masks, belts, and handheld wands — each designed for different treatment areas and lifestyles.
Identify your device type and learn its output
Check your device documentation for key specs: wavelength (red light typically ranges from 600–700 nanometers), power output (measured in milliwatts), and coverage area. If you're using a Lunara Light™ LED Red Light Therapy Panel, for instance, you'll benefit from clinical-grade photobiomodulation designed for full-face and body use. Masks and portable devices work well for targeted facial treatment, while larger panels suit whole-body sessions.
Read the manufacturer's guidelines
Every device has recommended usage parameters. These exist for a reason — they're based on clinical testing and safety protocols. Your manual will specify optimal distance, session duration, and frequency. Ignoring these recommendations can lead to diminishing returns or skin irritation, so don't skip this step.
Step 2: Prepare Your Treatment Space
Your environment matters more than you might think. Red light therapy works best when you're focused, comfortable, and set up for success.
Choose a dedicated location
Select a clean, quiet space where you can sit or stand comfortably for 10–20 minutes without interruption. A bedroom, bathroom, or dedicated skincare corner works perfectly. Make sure the area has good ventilation — you won't be doing anything strenuous, but fresh air enhances the experience.
Clear distractions and set up lighting
Turn off overhead lights if you're using a device that emits visible red light (most do). This helps your eyes adjust and lets you focus on the treatment. If you're using a mask, you'll be in darkness anyway, so position a chair or stool at comfortable height beforehand.
Test your power source
Make sure your device is fully charged or has easy access to an outlet. The last thing you want mid-session is a dying battery. If your device is portable — like the Lunara Light™ GlowMask Bendable + Portable — charge it completely before your first use.
Step 3: Cleanse and Prepare Your Skin
Red light therapy is most effective on clean skin. Any barrier between the light and your skin reduces penetration and efficacy.
Wash your face with a gentle cleanser
Use lukewarm water and your regular face wash to remove dirt, oil, and makeup. Pat dry completely — wet or damp skin can interfere with certain device types, particularly masks. If you're treating other body areas (neck, chest, back), cleanse those too.
Skip actives for this session
If you typically use vitamin C, retinol, or acids in your routine, apply those *after* your red light therapy session, not before. Starting with a clean slate lets the light do its job without competing ingredients.
Check that your skin is completely dry
Moisture can create an uneven treatment surface. If you prefer to apply a hydrating product, wait until after your session.
Step 4: Position Your Device at the Correct Distance
Distance is critical. Too far, and the light loses intensity. Too close, and you risk discomfort without added benefit. This is where manufacturer guidelines become essential.
Measure or estimate the recommended distance
Most red light therapy panels are designed to be used 4–12 inches from the skin, depending on power output. Masks sit directly on the face, so distance isn't an issue there. If you're using a handheld or panel device, use your device's documentation as your baseline.
Use a mirror for alignment
Position your device so that light covers the area you're targeting — face, neck, chest, or body. A mirror helps you see what you're doing, especially if you're new to this. Your goal is even coverage of the intended treatment zone.
Secure the device if needed
If you're using a panel, consider a stand or wall mount so you don't have to hold it. This frees your hands and ensures the device stays at the right distance throughout your session. If you're wearing a mask, adjust the straps for a secure but comfortable fit.
Step 5: Set Your Timer and Begin Your Session
Now the real work begins. Consistency is more important than intensity when it comes to red light therapy.
Start with manufacturer-recommended duration
Most devices recommend 10–20 minutes per session. Set your timer on your phone or use a kitchen timer. Starting conservatively is smart — you can always extend sessions after a week or two once your skin adjusts.
Stay still and let the light work
Don't fidget, don't move the device around, and don't check your skin every 30 seconds. The light needs uninterrupted time to penetrate your skin and trigger cellular benefits. Use this time to relax, breathe deeply, or listen to a podcast.
Note how your skin responds
Pay attention to any warmth, redness, or tingling — these are often normal responses, but extreme discomfort isn't. If you experience pain, stop immediately and consult the device manual or contact customer support.
Step 6: Integrate Red Light Therapy into Your Routine and Track Results
One session won't transform your skin. Red light therapy works through consistent, cumulative exposure.
Establish a regular schedule
Aim for 3–5 sessions per week to start. Many users find that daily short sessions (10–15 minutes) work better than sporadic longer ones. Write your sessions in a calendar or phone reminder so you stay consistent.
Apply skincare after your session
After your red light therapy session, your skin is primed and receptive. Apply serums, moisturizers, or other treatments within 5 minutes while your skin is still warm and ready to absorb products. This maximizes the benefits of both the light and your skincare lineup.
Track changes in your skin over 4–6 weeks
Red light therapy isn't an overnight fix. Most users notice improvements in skin texture, firmness, or radiance within 4–6 weeks of consistent use. Take before-and-after photos under the same lighting to document your progress objectively.
Common Mistakes to Avoid

Mistake 1: Using the device with makeup or sunscreen still on. Light can't penetrate a barrier. Always cleanse thoroughly before treatment. Even a light moisturizer can reduce efficacy slightly, so timing matters.
Mistake 2: Expecting instant results and quitting too soon. Red light therapy builds benefits over time. If you abandon the routine after two weeks, you won't see the results that show up by week six. Commit to at least 4 weeks of consistent use before evaluating effectiveness.
Mistake 3: Ignoring the recommended distance or duration. More isn't better. Overusing red light therapy or placing the device too close won't speed up results — it can actually cause irritation. Stick to guidelines and adjust only after your skin fully adapts.
Mistake 4: Using red light therapy alone without adjusting other habits. Light therapy is powerful, but it works best alongside a solid skincare routine, hydration, sleep, and sun protection. Don't expect the device to compensate for neglecting these fundamentals.
FAQ
How long does it take to see results from red light therapy?
Most users notice improvements in skin texture and tone within 4–6 weeks of consistent, 3–5 times weekly use. Some people see subtle changes earlier, but dramatic results typically take 8–12 weeks. Patience is key.
Can I use red light therapy every day?
Yes, daily sessions are generally safe and often effective, especially if you keep sessions shorter (10–15 minutes). However, start with 3–5 times per week and increase gradually as your skin adapts. Listen to your skin — if you notice irritation, dial back frequency.
Is red light therapy safe for all skin types?
Red light therapy is well-tolerated across most skin types, including sensitive skin. However, if you have active inflammation, open wounds, or certain skin conditions, consult a dermatologist before starting. Some medications can increase photosensitivity, so check with your doctor if you take photosensitizing drugs.
Can I combine red light therapy with other skincare treatments?
Yes. Red light therapy pairs well with most skincare routines. Apply it before serums and moisturizers to maximize absorption, and wait at least 2–3 hours after chemical peels or strong actives before using red light. If you're undergoing professional treatments like facials or laser work, ask your aesthetician about timing.
What's the difference between red and infrared light therapy?
Red light (600–700 nm) primarily benefits skin surface and near-surface layers, supporting collagen and reducing inflammation. Infrared light (700–1000+ nm) penetrates deeper, reaching muscle and joint tissue. Many devices combine both for comprehensive benefits.
Sources
- PubMed Central — Search "red light therapy skin" for peer-reviewed clinical studies
- FDA Official Website — Guidance on light-based skincare devices
- American Academy of Dermatology — Evidence-based skincare device information